
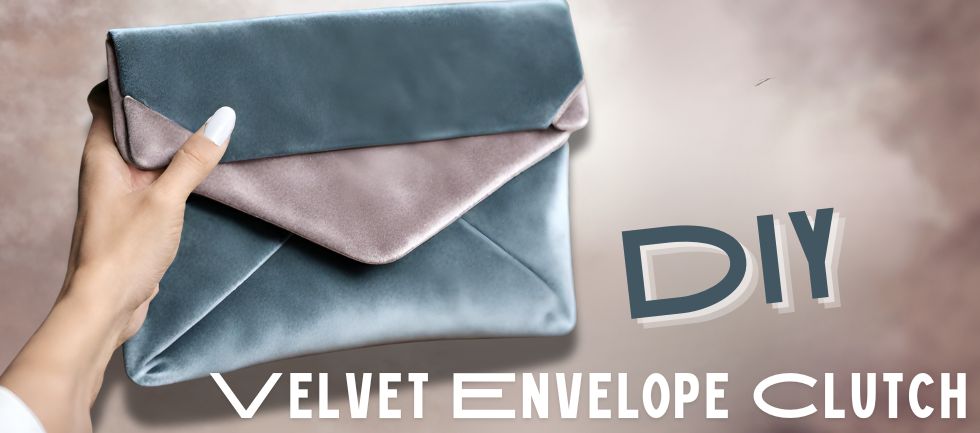
Velvet is having a moment in the fashion world, and what better way to enjoy this luxurious trend than by crafting your very own velvet envelope clutch? This chic accessory is not only stylish but also surprisingly simple to make.
As the New Year beckons, there's no better time to engage in a bit of crafting to upgrade your style. The inspiration behind this project stems from a desire to carry something unique and on-trend into the upcoming year.
Velvet, with its luxurious texture and timeless appeal, is popular as the perfect fabric choice for our creative projects. Soft to the touch and visually captivating, velvet lends itself beautifully to creating a statement accessory that exudes sophistication
Step-by-Step Guide to Making a Velvet Envelope Clutch
Materials You'll Need:
- Pins
- Scissors
- A brooch (optional, for embellishment)
- Needle
- Thread
- Velvet fabric
Step 1: Prepare the Pattern
The first step in creating your velvet envelope clutch is to prepare the pattern. Don't be intimidated by the thought of intricate patterns – this one is simpler than it looks. Start by cutting out a giant 10.5-inch square of velvet fabric. This will form the body of your clutch. Next, you'll need to add a 4.5-inch triangle to the top of the square.
This will create the flap of the envelope. Cut out two identical pieces using this pattern. For the second piece, you'll need to make a small adjustment. Along the top edge of the triangle, cut along the 8-inch dotted line. This will allow the flap to fold over neatly when the clutch is assembled.
Get a Complete knowledge on How to Sew with Velvet Fabric?
Step 2: Assemble the Clutch Body
Now that you have your fabric pieces cut out, it's time to start assembling the clutch. Place the two square pieces of velvet fabric together, with the right sides facing each other. Pin along the edges to hold them in place. Using a needle and thread, sew along the three sides of the square, leaving the top edge open. Be sure to leave a small seam allowance to ensure a neat finish.
Once you've sewn the sides together, trim any excess fabric and clip the corners to reduce bulk. This will help the clutch to lay flat when it's turned right side out.
Step 3: Add the Flap
With the body of the clutch assembled, it's time to add the flap. Take the piece of fabric with the triangle flap and fold it over the top edge of the clutch body. Pin it in place, ensuring that the edges line up neatly.
Using your needle and thread, sew along the top edge of the flap to attach it to the body of the clutch. You can choose to leave the edges raw for a more casual look, or you can fold them under and hem them for a cleaner finish. Feel free to get creative here – you could add decorative stitching or embellishments to make your clutch truly unique.
Step 4: Final Touches
With the basic structure of the clutch complete, it's time to add some finishing touches. If you're feeling fancy, you can embellish your clutch with a brooch or other decorative accent.
Simply sew it onto the front of the clutch, making sure to secure it firmly in place. You could also add a snap closure or magnetic fastener to keep your belongings secure. Once you're happy with the embellishments, give your clutch a final press with an iron to smooth out any wrinkles and ensure a polished finish.
And there you have it – your very own velvet envelope clutch! If you're heading out for a night on the town or simply want to add a touch of glamour to your everyday look, this chic accessory is sure to turn heads. So, grab your sewing supplies and give it a try.
And remember, if you want to buy velvet fabric don't hesitate to visit our stretch velvet fabric collection. Happy sewing! 😊